Managing Quarantined Files
Powertech Antivirus allows you to easily view and manage files that have been quarantined as a result of On-Demand Scanning or On-Access Scanning.
The option to quarantine files (set to 'off' by default) can be set in the Configuration used for the scan. See On-Access Configuration pane, On-Demand Configuration pane.
See also avsvc command, avscan command, and avconfig command.
To view, delete, or restore quarantined files
- From the Navigation Pane, choose Endpoints. The Endpoints screen appears. If a virus scan has resulted in quarantined files, "Quarantined: Number of files" appears in the endpoint's row.
- For an endpoint with quarantined files, click
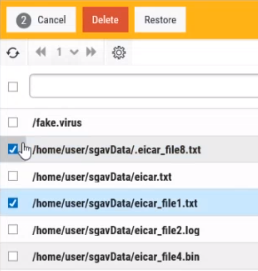
 > Manage Quarantine. The Quarantined Files screen appears. This screen displays a list of all quarantined files along with the original file path (where the infected files were found).
 -
Use the check boxes to the left of the virus paths to select the files you want to delete or restore. A yellow bar appears at the top of the screen with additional options.
-
Choose Delete to remove the selected files, or Restore to replace them to their original location.
NOTE: If you restore a file that has been detected by Powertech Antivirus without adjusting either the file or detection procedure (by, for example, cleaning the file or updating virus definitions), it will continue to be flagged and quarantined by Powertech Antivirus' scans.
 Previous - Scheduling Updates and Scans